Smart Management of Your
X Account Following
Automatically detect inactive users, batch unfollow with one click. Keep your following list organized and save precious time.
Powerful Features
A carefully crafted account management tool for X users, making following management simple and efficient
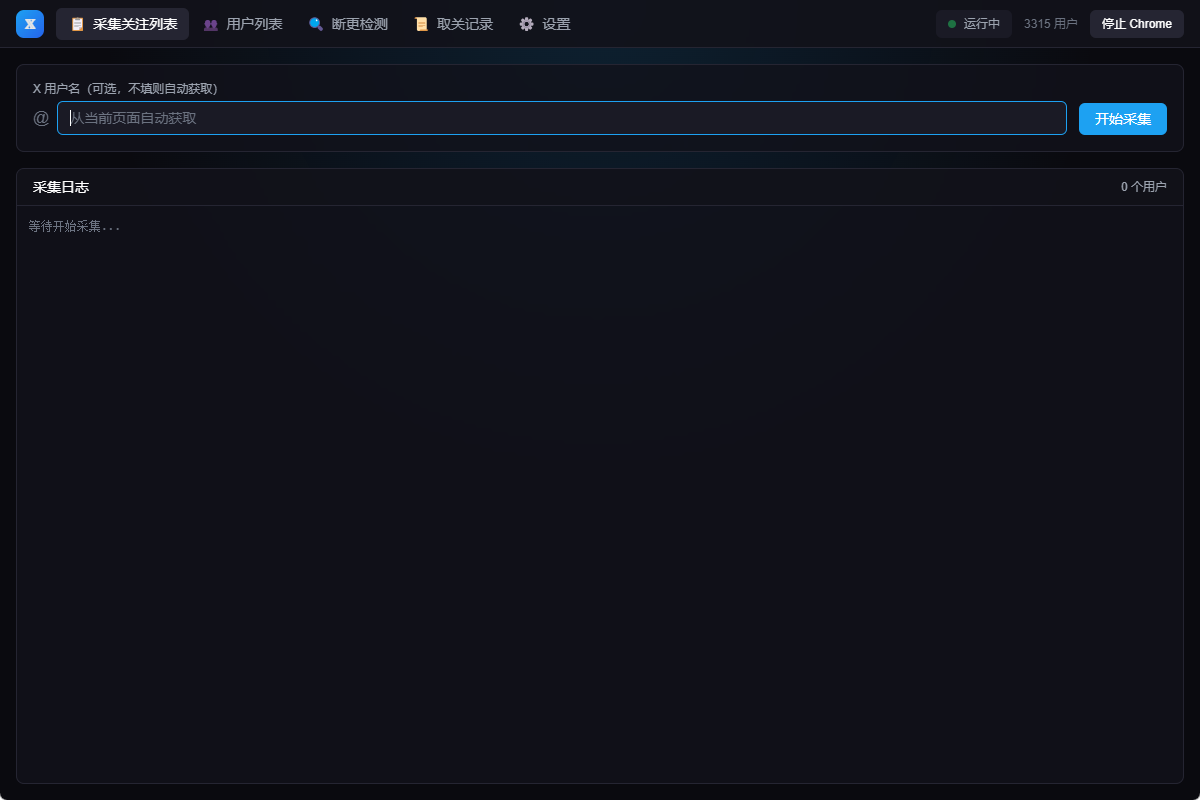
Smart Collection
One-click following list collection, supports specific user collection, data automatically stored in database
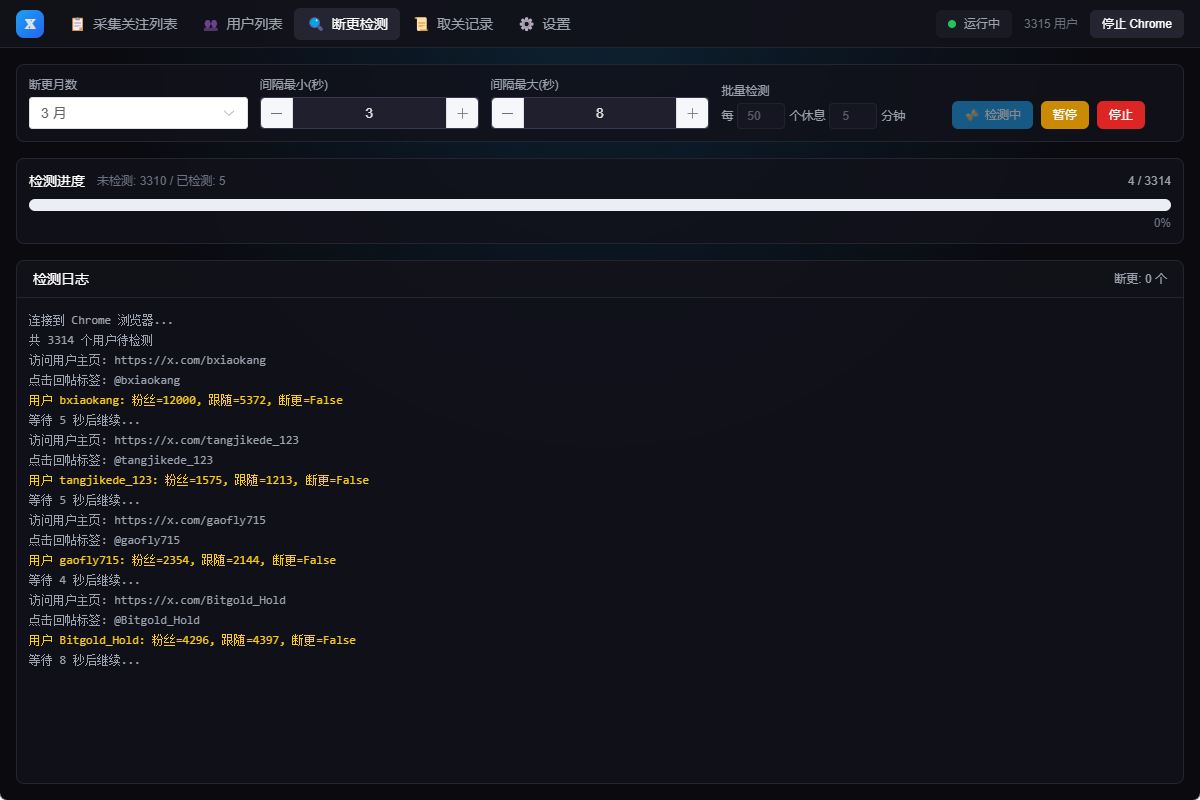
Inactivity Detection
Automatically detect user post and reply activity, accurately identify inactive accounts
Batch Unfollow
Support batch auto unfollow, smart handling of users with subscription features
Safe & Reliable
Runs locally, data never uploaded, protects your privacy
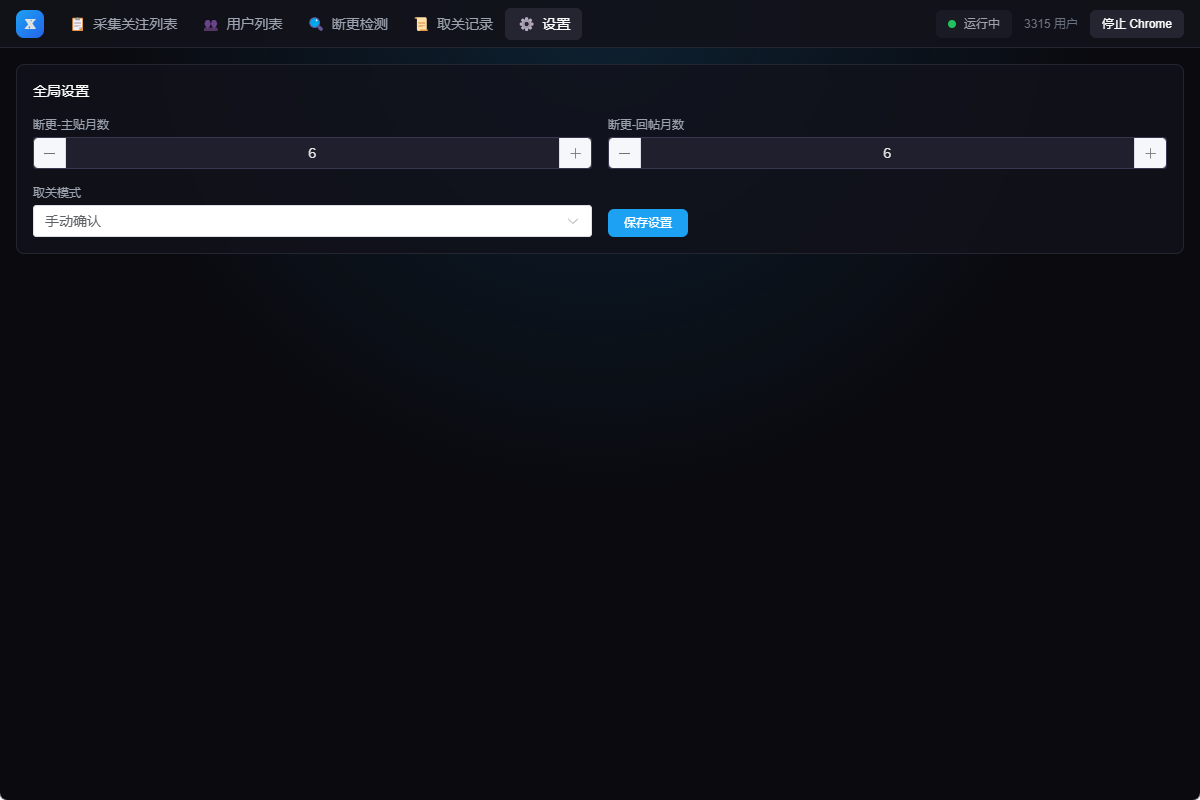
Flexible Configuration
Support custom inactivity months, detection interval, batch rest parameters
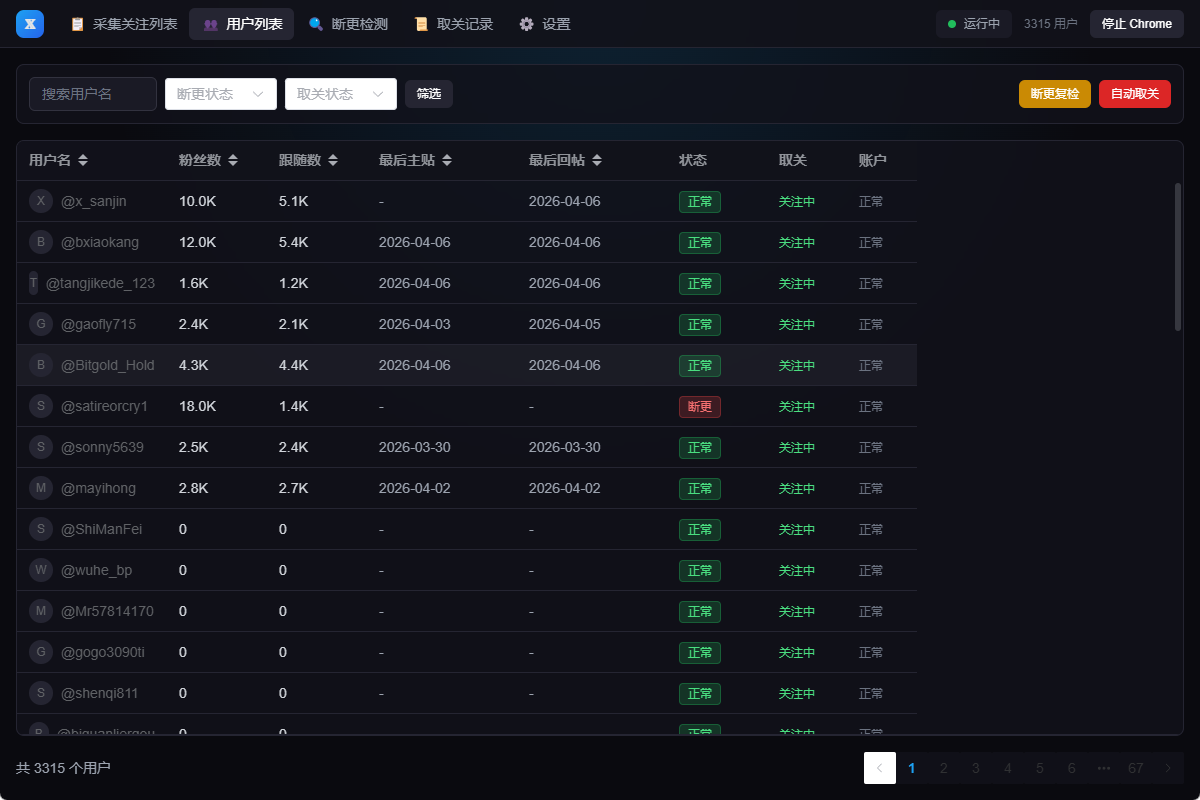
Data Statistics
Complete user data display, supports search, filter, sort
Interface Preview
Clean and modern user interface, operations一目了然
Installation Guide
No Python or other dependencies required
Preparation
Log in to your account, click profile
Default directory: C:\Program Files\X Account Manager\
How to Use
Four simple steps to manage your following list
Start Chrome
Open X.com, log in to your account, click Profile in left menu
Collect List
One-click collect your following list, data saved to local database
Detect Inactivity
Configure parameters and start detection, system automatically identifies inactive users
Batch Unfollow
Confirm and one-click unfollow all inactive users, keep list organized
Download Now
Free and open source, supports Windows platform
How to Add New Language Configuration
Complete guide for developers and advanced users to customize language settings
Overview
The application supports multi-language functionality across three systems: Frontend UI (Vue-i18n), Python Backend (ariaLabels, suspendedText, numberUnits), and Rust Backend (rustMessages). All systems share the same configuration file.
Configuration File Location
- Development: _up_/lang/config.json in project directory
- Production: C:\Users\[YourName]\.xmanager\lang_config.json (auto-extracted on first run)
Step-by-Step Guide
Step 1: Add Language Entry
Add a new language object in _up_/lang/config.json under "languages" key. Example: "fr-FR" for French.
"fr-FR": {
  "name": "Français",
  "ariaLabels": { ... },
  "suspendedText": [ ... ],
  "numberUnits": { ... },
  "rustMessages": { ... }
}
Step 2: Configure ariaLabels (Python)
Define X.com button text in your language. Use {username} placeholder for dynamic replacement.
"ariaLabels": {
  "subscribe": "S'abonner à @{username}",
  "unfollow": "Ne plus suivre @{username}",
  "following": "Suivant @{username}"
}
Step 3: Configure suspendedText (Python)
Add patterns to detect suspended accounts. Multiple patterns improve detection accuracy.
"suspendedText": [
  "Ce compte a été temporairement limité",
  "compte a été temporairement limité"
]
Step 4: Configure numberUnits (Python)
Define number abbreviations and their multipliers. Different languages use different units.
"numberUnits": {
  "K": 1000,
  "M": 1000000,
  "B": 1000000000
}
Step 5: Configure rustMessages (Rust)
Translate all backend error messages. Must include all 22 keys (see en-US template).
"rustMessages": {
  "db_error": "Erreur de base de données",
  "exec_failed": "Échec de l'exécution",
  "collect_complete": "Collecte terminée",
  "collect_failed": "Collecte échouée",
  "check_complete": "Vérification terminée",
  "check_failed": "Vérification échouée",
  ...
}
Step 6: Add Frontend Locale
Create src/locales/fr-FR.json with all UI translations. Copy structure from en-US.json.
Step 7: Register in i18n.ts
Import and register the new locale file in src/i18n.ts and add to getAvailableLanguages().
import frFR from './locales/fr-FR.json'

const messages = {
  'en-US': enUS,
  'zh-CN': zhCN,
  'fr-FR': frFR,
}

getAvailableLanguages() {
  return [
    { code: 'en-US', name: 'English' },
    { code: 'zh-CN', name: '简体中文' },
    { code: 'fr-FR', name: 'Français' },
  ]
}
Testing Your Configuration
- Edit config file with your translations
- Restart the application
- Select your language in Settings
- Test all operations to verify messages
- Check X.com button detection works correctly
Important Tips
- ✅ All rustMessages keys are required - missing keys will use English defaults
- ✅ Test ariaLabels on X.com to ensure button detection works
- ✅ JSON syntax must be valid - use a JSON validator
- ✅ Language code format: ll-CC (e.g., en-US, zh-CN, fr-FR)
- ✅ Share your config file to help other users